Centos Minimal Installation
Centos 6.5 Minimal[edit | edit source]
Why minimal install?[edit | edit source]
A minimal install only includes files and processes necessary for the computer to run. This then cuts out any unnecessary background processes that would interrupt the experiment.
Creating a Bootable USB[edit | edit source]
Format Disk[edit | edit source]
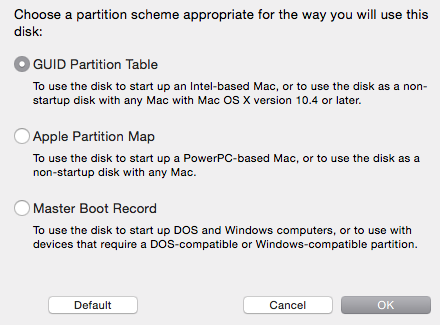
Format a 4GB+ USB Disk as GUID/FAT32.
Prepare Disk Image and Copy to Disk on Mac or Linux[edit | edit source]
-
Download CentOS-6.5-i386-minimal.iso, Mirrors available here.
-
Open Terminal
-
Convert the .iso file to .img using the convert option of hdiutil e.g.,
hdiutil convert -format UDRW -o ~/path/to/target.img ~/path/to/ubuntu.iso
Note: OS X tends to put the .dmg ending on the output file automatically.
Note: Try not using ~ for home directory, instead use path from root. Dragging file into the terminal window also pastes the path directly into terminal.
-
Run
diskutil list
to get the current list of devices. -
Insert your flash media.
-
Run
diskutil list
again and determine the device node assigned to your flash media (e.g. /dev/disk2). -
Run
diskutil unmountDisk /dev/diskN
(replace N with the disk number from the last command; in the previous example, N would be 2). -
Execute
sudo dd if=/path/to/downloaded.img of=/dev/rdiskN bs=1m
(replace /path/to/downloaded.img with the path where the image file is located; for example, ./ubuntu.img or ./ubuntu.dmg).- Using /dev/rdisk instead of /dev/disk may be faster
- If you see the error dd: Invalid number '1m', you are using GNU dd. Use the same command but replace bs=1m with bs=1M
- If you see the error dd: /dev/diskN: Resource busy, make sure the disk is not in use. Start the 'Disk Utility.app' and unmount (don't eject) the drive
-
Run
diskutil eject /dev/diskN
and remove your flash media when the command completes. -
Restart your Mac and press alt/option key while the Mac is restarting to choose the USB stick.
Prepare Disk Image and Copy to Disk on PC[edit | edit source]
For installing Centos 6.5, USB keys can be used to install the desied ISO by using dd.
dd if=CentOS-6.5-x86_64-bin-DVD1.iso of=/dev/sdb
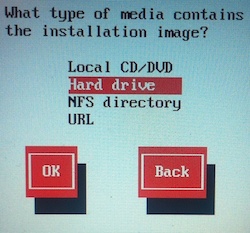
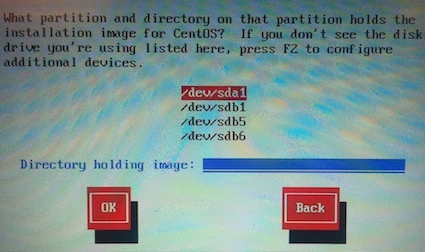
When asked for media, select "Hard disk" and *the device* corresponding to the USB Key (make sure to select device and not partition).
For Centos 7, there are issues with Windows tools transferring the Centos installer image correctly. Only use dd for Windows, or Rawrite32, or Win32 Disk Installer. If using a version of Windows newer than Windows 7, make sure you unmount the USB drive first (or format it before launching the disk copier) otherwise you will receive a "can't write to drive" error message.
If using dd for Windows, run dd --list and look carefully at the list of NT Block Device Objects and use the one that looks like \\?\Device\Harddisk1\Partition0 where the description is something like "Removable media other than floppy. Block size = 512". Be very careful about which output device you pick or you may overwrite something on accident. The specific path will vary.
It is not recommended you install anything past Centos 6.5 at this time, as only the latest version of Centos is ever supported.
Installing Centos[edit | edit source]
-
Boot from USB
-
Use default hostname.
-
Set root password.
-
Choose “Use All Space”
-
Wait for install to finish and reboot.

Mounting a USB[edit | edit source]
After installing the minimal OS follow these steps to mount a USB:
- Plug in the USB
- Look for
[root@localhost "]# sd 6:0:0:0: [sdb] Assuming drive cache
sd 6:0:0:0: [sdb] Assuming drive cache: write through
sd 6:0:0:0: [sdb] Assuming drive cache: write through
- The command needed is
mount /dev/sdb/ /mnt
Unmounting[edit | edit source]
Make sure you are out of the mount directory. The command is
umount/mnt
And you're unmounted.


