Geant4 Cosmic Ray Detection Simulation
Creating a Simulation[edit | edit source]
Geant4 is a software platform used to simulate particle interaction with matter. It allows us to create a simulation of cosmic rays passing through a scintillator, and get the resulting data about the energy and behavior of the muons. CERN has several simulation examples that range from novice to advanced levels. Examining and editing these existing examples will prove to be valuable in setting up experimental simulations.
Modifying Geant4 Examples[edit | edit source]
Geant4 has many basic examples of source code for simple geometry creation, particle gun set up, particle/matter interaction physics, and much more that will be utilized in this simulation.
1. Basic Geometry
The B1 example simulation created two water filled figures being hit with a proton beam starting from random initial positions. The simulation was altered to create a single rectangular figure made of polystyrene to represent the scintallator. The beam was changed to muon particles starting at the same initial point. The examples can be found at:
2. Basic Histograms/NTuples
Example B4 includes samples of a runAction and an eventAction that define and fill histograms and ntuples.
The link to the source files can be found below:
3. Advanced Scintillator
However, for a more advanced setup, CERN has an optical photon example that utilizes a PMT along with a scintillator to capture the deposited energy.
The three directories to check are listed in the link below:
Particle Simulation[edit | edit source]
1. Random Momentum Vectors
Following the initial setup of the program in Geant4, multiple things had to be changed in order to simulate an actual scintillator. One of these changes was to make the momentum vectors x,y, and z random to simulate how actual cosmic rays hit the scintillator. Before the edit was made, the particle beam shot in the manner shown below.
Helpful Geant4 Code :
Setting the momentum: fParticleGun->SetParticleMomentumDirection(G4ThreeVector(0.,0.,1.));
Now the Px, Py, or Pz components can be set and changed to augment the momentum in any orientation.
Example 1: Same Angle

Then, using a random number generator along with a time based seed, any number of particles could be shot at the scintillator, all at different angles from the starting point. The simulation of one hundred muons shot at different angles is displayed below.
Example 2: Various Angles
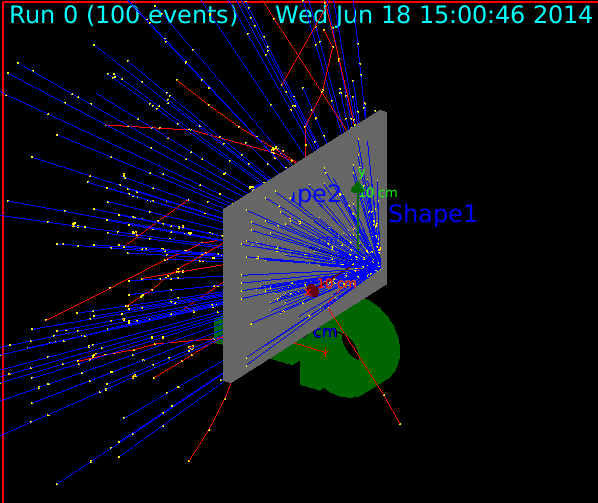
This change more accurately captures what occurs with the actual scintillator and was implemented to make it more realistic.
2. Random Muon Energies
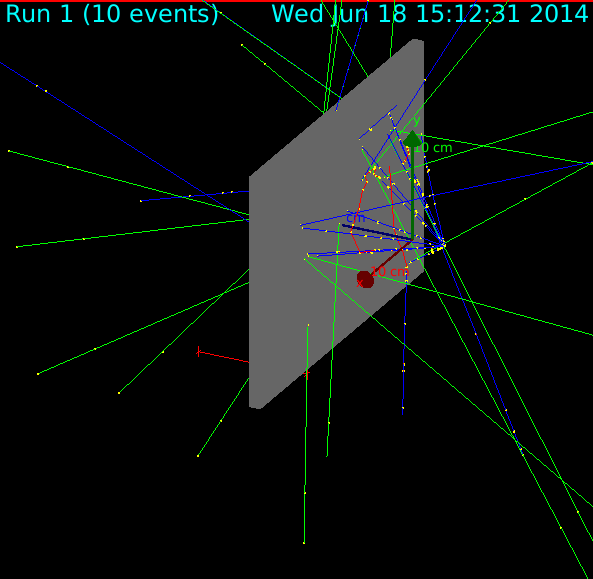
In order to better simulate the actual scintillator, the energy of the muon had to be changed from a set number to a randomly chosen number as well. Geant4 was altered to make the energy random for every trial. So, after this change was made, every single muon could be shot at random angles with random energies ranging from 0.35 GeV to 20 GeV. This range of energies was chosen from previous experiments that showed which energies were the best to use. Before the change was made, the simulation had a set, chosen energy. One of these simulations is displayed below.
Helpful Geant4 Code :
Setting the energy: fParticleGun->SetParticleEnergy(6.*MeV);
Example 3: Various Angles and Random Energies
Geant4 Simulation[edit | edit source]
Two Scintillators[edit | edit source]
In order to better simulate the real world, a second scintillator was put into the simulation. Then, a second scoring volume variable and energy deposition variable were created. Header files had to be altered in order to allow for these variables to be created. Numerous methods in the runacction(), eventacction(), primarygeneratoraction(), and run() header files had to be duplicated to allow for more variables to be created.
Finding Theta[edit | edit source]
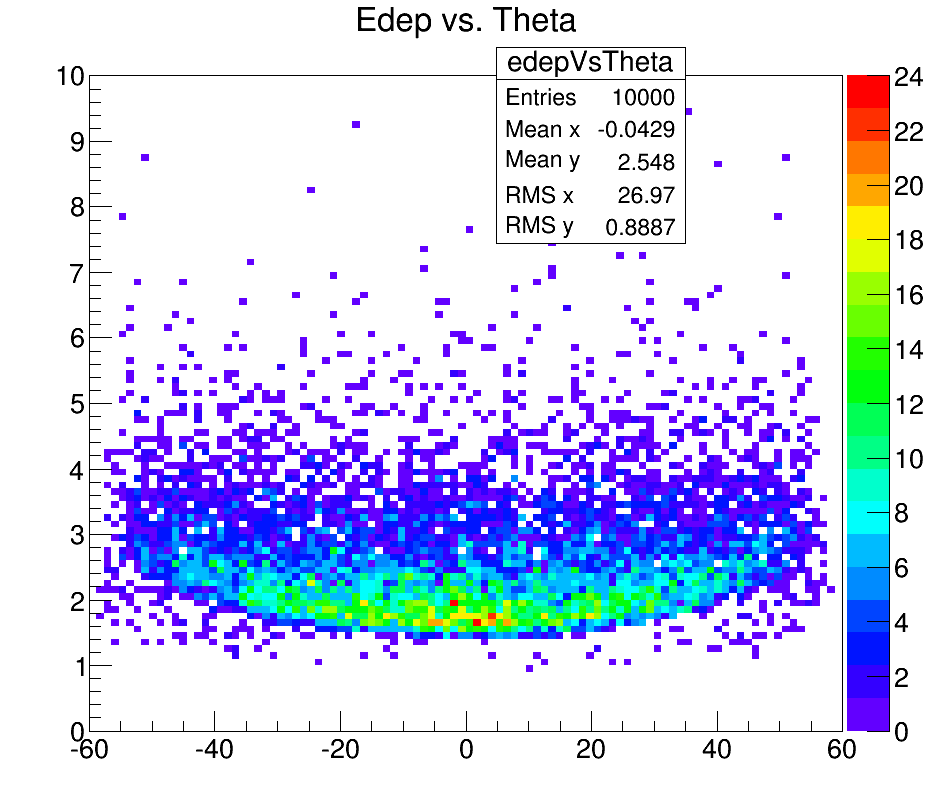
Then, the angle had to be found. Using a triangle and finding the arctangent of the upper angle, theta of the experiment could be found. This theta in the simulation was the same one found in the actual experiment. Following the finding of theta, theta was plugged properly into the distribution used to find the energy of the particle shot out of the beam. When setting the particle energy, Geant automatically sets the energy in KeV. So, the energy needed to be multiplied by 1000. A two dimensional histogram was drawn to compare the energy deposition in the first scintillator versus theta. This is displayed below.
Finding Theta in a Different Manner[edit | edit source]
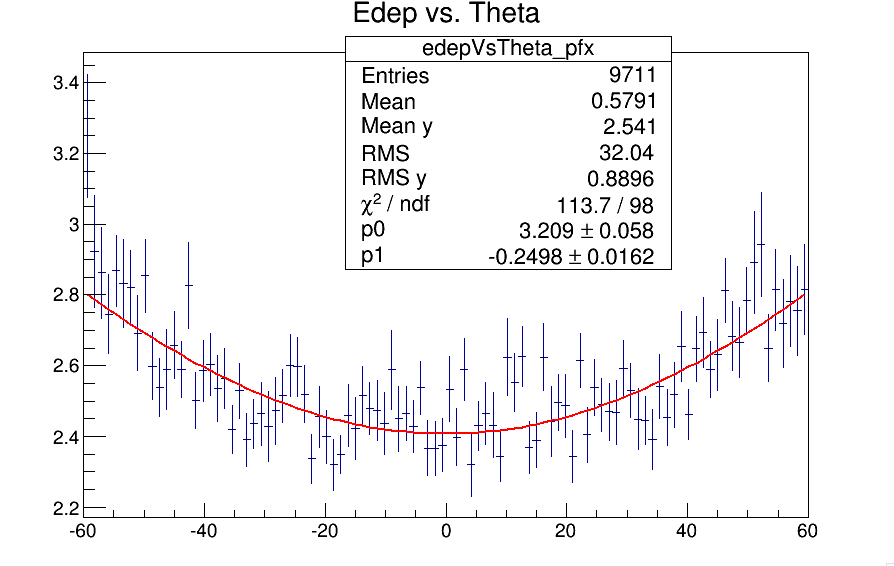
This data had a greater curvature. The curvature in the Geant simulation was about 60%, whereas the curvature in the experiment was about 22%. Since the curvature was so much greater in the simulation, it was figured that much of the data in the actual experiment was being skewed by the resolution of the experiment. After this, it was decided that some of the difference in curvature was due to how theta was being measured in the simulation. In the experiment, theta was found using the difference between the top and bottom scintillators. However, in the Geant simulation, theta was found using just the top scintillator. So, another method to find theta using both scintillators was found and executed. This method involved picking a point randomly from the top scintillator and a point randomly from the bottom scintillator. Then, the momentum magnitude in the x direction was found to be the x location of the point on the bottom scintillator subtracted from the x location of the top scintillator. The y direction momentum was found in the same method as the x direction. The momentum in the z direction was just distance between the two scintillators. Finally, the slope was found in all three directions and traced back to the point where it should begin in order to hit both scintillators. This point was then used as the starting point for the particle in the simulation. After finding the starting position, a new theta was found using the two scintillators. The data, as shown below, did not yield the same results as the experiment. Even with the new method of finding theta, the simulation was still too accurate when compared with the experiment.

Changing Angle Distribution[edit | edit source]
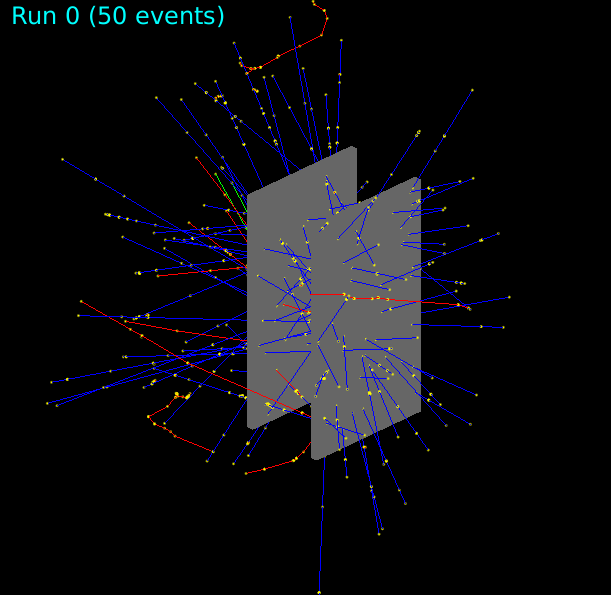
The next thing that needed to be changed was the run limit. Originally, Geant would not allow for more than 100 events per run, but by altering the vis.mac file from N=100 to N<0. This allowed for an unlimited number of events to be run per run. Another thing that had to be changed was the dependency of the angle coming in from the sun. This angle had a cosine squared dependency and was placed into the code in order to make the simulation more like the actual experiment. An example of a run with this dependency implemented is shown below.
Finding the Proper Skew[edit | edit source]
The final change that needed to be made was the final graph needed to be skewed in the simulation in order to get a run that was closer to the actual experiment. In order to implement the exact skew the actual experiment, the top and bottom data collected had a random Gauss fit number added to it. This made sure that the data was stretched out to be slightly tighter. The correct range was between 0 and 4 centimeters. An example of the graph with the skew is shown below.
